

DIY cement pots w my lil' cousin ♡
- elanorandbade
- Apr 21, 2016
- 3 min read
Hi cuties!
Soo i promised a DIY post quite a while ago and a few weeks ago my little cousin wanted to do some crafts so i leapt at the opportunity to turn this craft with my little cousin into a DIY post! At first she just wanted to do a little craft but she was super excited to make these cement pots!
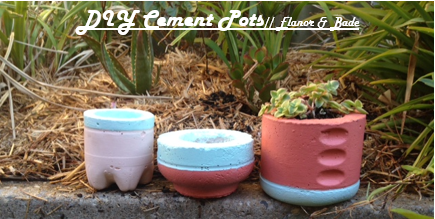
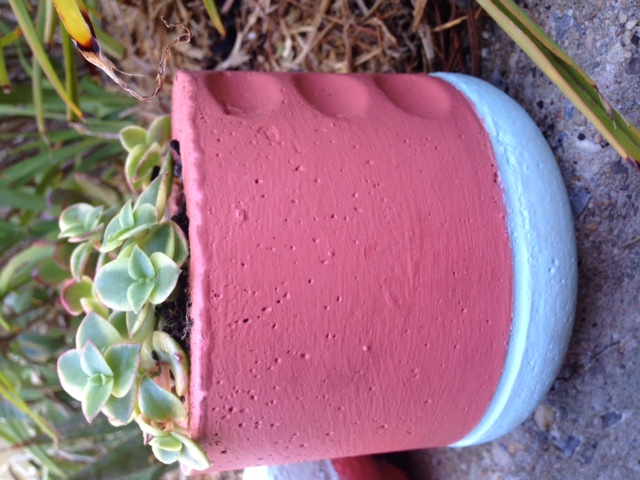
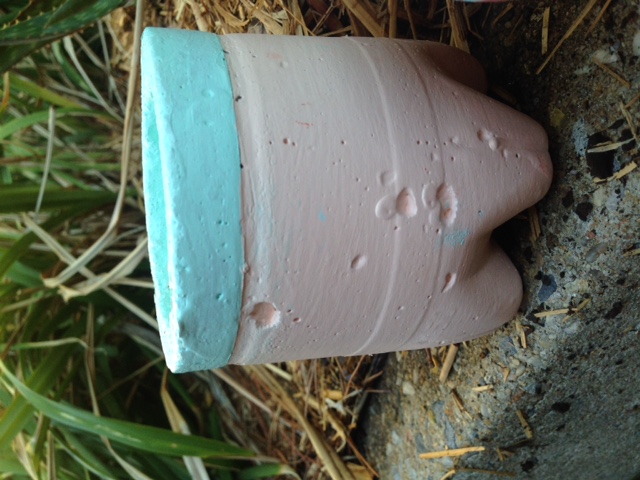
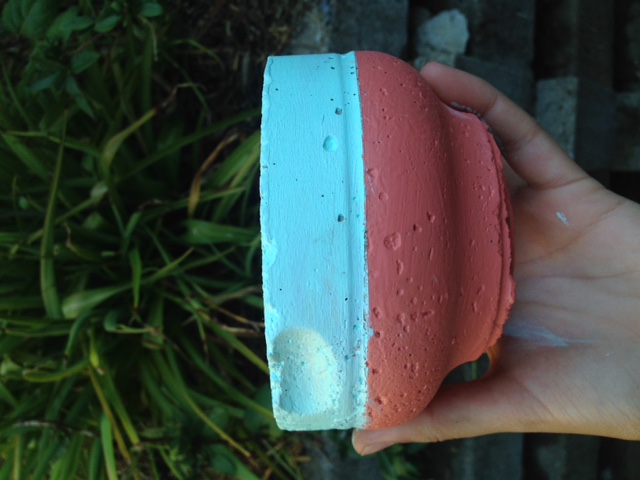
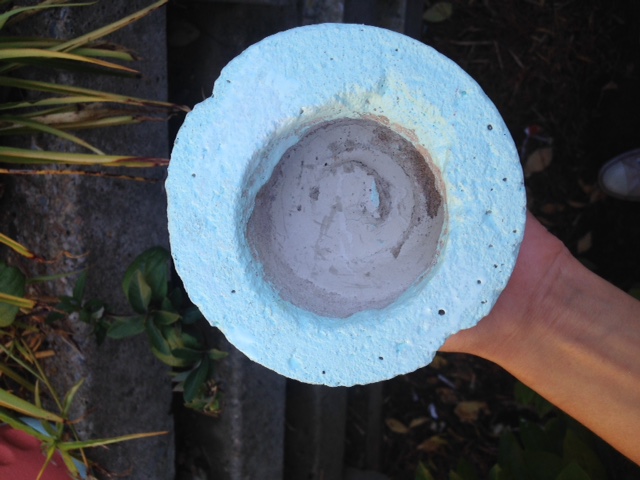
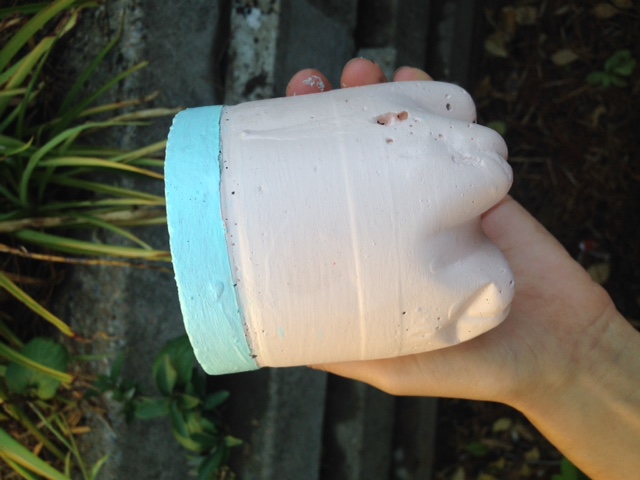
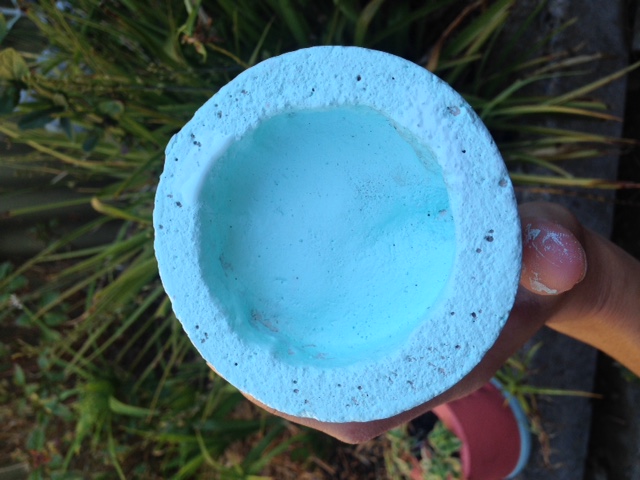
Sooo making these pots were super fun. My cousin wasn't too interested in using them all as pots for plants, she wanted to use them to keep little things like coins, paper clips and her little collection of erasers! (thats why only one of the three pots were deep enough to plant a plant in)
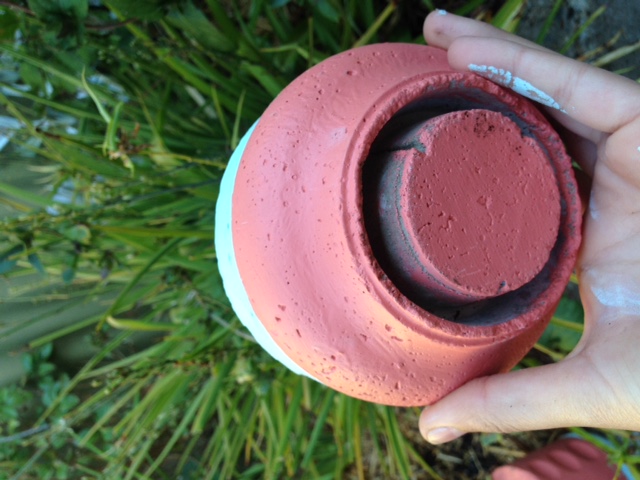
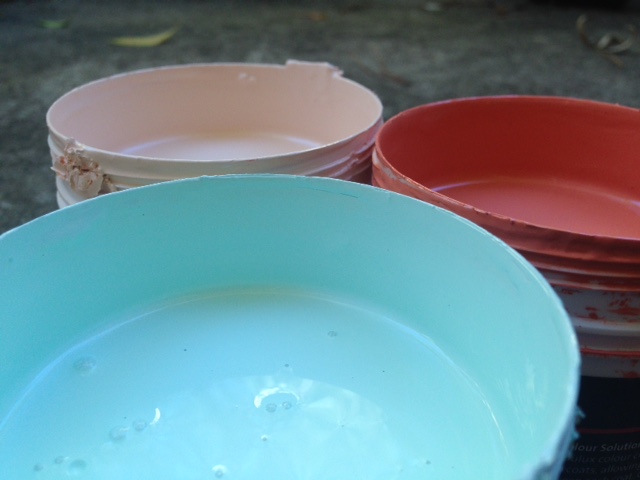
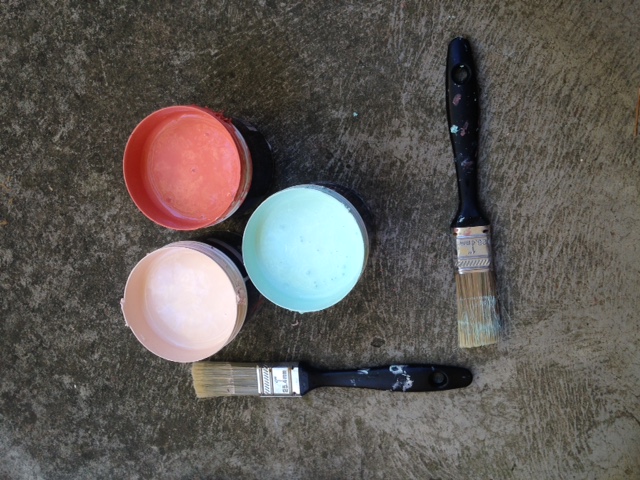
First of all we went to the hardware store and bought a bag of cement and three different tester pots of paints that my cousin chose. (For privacy reasons i'm not using her name!) She chose a darker pink, a baby pink and a sort of baby blue! (not sure of the proper names of the paints-sorry! They were purchased from Banner (the hardware store))
This DIY does take a little while, its not just your usual weekend DIY, we worked on it over about 3-4 weeks, i'm sure you could do it in less time, it was just between school time so i had tons of school work i needed to be doing first.
To begin with we made up our cement pots. (i didn't take photos, sorry- it was a messy task and i didn't really want a cement covered phone!) When your making up your pots you'r going to want to make them outside and use an old bucket to mix the cement in. Follow the instructions on your packet of cement, but all you really need to do is pour the desired amount of cement into a bucket, slowly add water and stir until you reach the correct consistency. At this point you'll need two containers per pot, one bigger on for the outside, (you pour the cement into this one) then another one thats smaller, you submerge this container into the pot so it makes a hole when its dried.
Drying does take a while- so patience is the key! We left it for about 2 weeks!
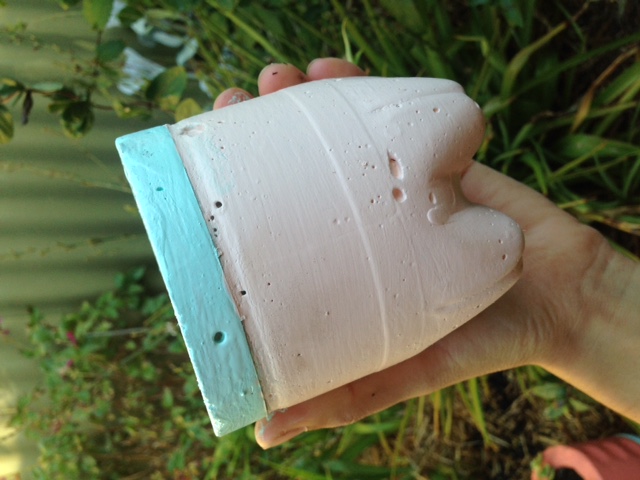
Then all you need to do is paint them your preferred colours (my cousin chose the colours and how we should paint all of them) and then either plant a plant or whatever you wanna use it for.
Below is the "recipe" (you can call it that i suppose...?) /how to make the pots and what you'll need!


WHAT YOU NEED!
1 x Bag of cement (however much you think you'll need!)
1 x Large container (per pot)
1 x Smaller container (per pot)
1 x Buckets (for mixing cement)
1 x cement mixing utensil (we used a stick)
cooking spray
Sandpaper
Paint in preferred colours
Paint brushes (we just chose some relatively cheap smaller brushes)
Paint Tape- i'm unsure of the proper name, but this is useful if you want to paint half your pot one colour, and half another, it stops paint from getting onto the other side (masking tape might possibly work too)
Plastic sheet (to lay on the ground/table/surface your working on- preventing a huge mess)
WHAT TO DO!
1. Mix up your cement in a medium-big bucket, the cement may set so work quickly
2. Spray each pot with cooking spray (preventing the cement from sticking)
3. Pour cement into your larger container, to about 3/4 of the way full
4. quickly submerge your smaller container into the center of your larger one (creating the hole in the pot)
5. Leave pot/s to dry for the required amount of time (the longer the better, you need them to be completely dry)
6. once your pots are completely dry, remove them from their molds
7. Paint your pots! Search through google for inspiration if you want, but just have fun!
8. leave your pots to dry
9. Add a plant or use for whatever purpose you choose!
Anddd your done!
These pots are super easy to make and i definitely recommend making them! They make great gifts! My cousin gave one of them as a present to one of her friends, and i gave one to my mum for her birthday!
If you do try them, make sure you send me photos (contact details below) i'd love to see them!


Thankyou very much for reading today's post! Sorry if it wasn't the type of DIY you all wanted, please tell me what other DIYs you want to see!
Once again thankyou for reading, i hope you enjoyed the post! Have a wonderful day/night, and i'll see you all at the next post!
Bye, byee!
Lili
SOCIAL MEDIA:
instagram: @elanorandbade
twitter: @elanorandbade
email: lili.blog22@mail.com


Comments